
 |
| Step-by-Step Tutorials |
#1 - Hello World |
|
A series
by RomanDA |
|
Listing of other DX Tutorials:
Click
here Today's Lesson:
"HELLO WORLD" the first program all programmers
have to make.
In this lesson we will
cover how to create a simple text object, change its color, font, and
size, we will even make it change color and size when we move our mouse
over it.
We will take this 1 step at a time, so you can follow along.
For this and all the
Step-By-Step DX Tutorials you will need to purchase
DesktopX for $14.95 from Stardock.
Lets get started. |
|
|
|
STEP 1 - Load DesktopX |
|
Once you have DesktopX
installed, look in your Start Menu for "Object Desktop" then for "DesktopX",
click it to load the program.
You will see the DesktopX
STARTUP Screen
(yours wont say PROFESSIONAL unless you purchased PRO)
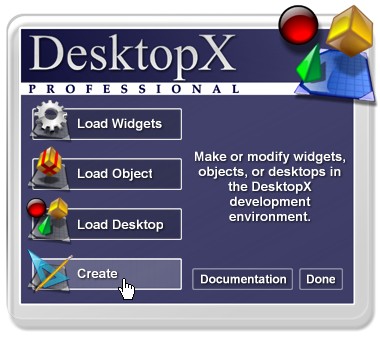 One you see this screen,
click on "CREATE" because we want to CREATE a new Widget.
One you see this screen,
click on "CREATE" because we want to CREATE a new Widget.
It will load the DesktopX
SETTINGS Window:
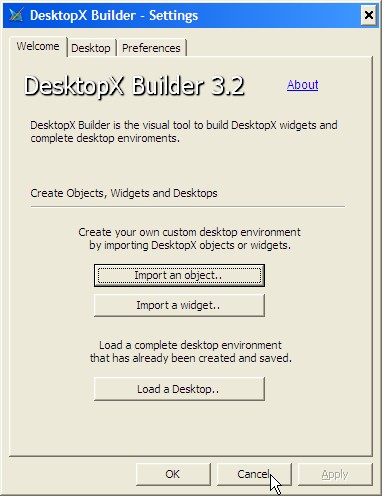
We just wish to get these
screens out of the way for now, we are not going to use them.
Click "CANCEL" on the SETTINGS window, and DONE on the STARTUP Screen.
You should have a blank
screen now with a new icon in your system tray:
 |
|
|
|
STEP 2 - Create an object |
|
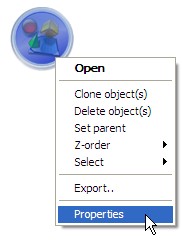
RIGHT CLICK on the
icon in
your system tray and you will see a popup menu like this one: |
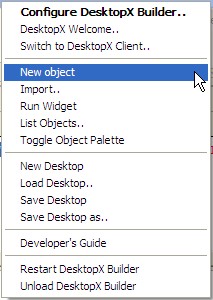 |
You will need to select the
"NEW OBJECT" item on this menu. |
|
You will see the OBJECT
PROPERTIES window below (as well as the object itself).
This window will be referenced over and over in these tutorials.
IE: Open Properties / Select States
(which would mean to select the States TAB in the
Properties window)
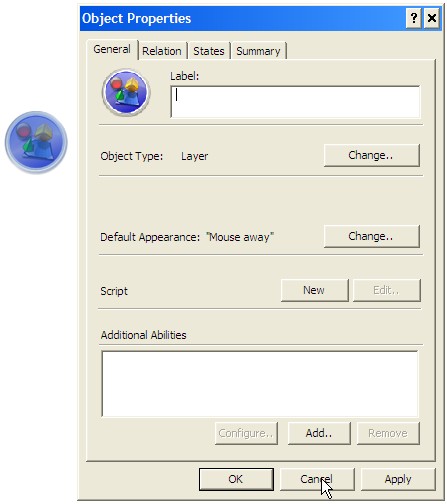
You can access this
properties window at any time by RIGHT-CLICKING on the object and
selecting PROPERTIES.
 |
|
|
|
STEP 3 - ADDING THE HELLO WORLD TEXT |
When you added the object,
it brought up the PROPERTIES window, now select the "STATES" tab to
change to this TAB.
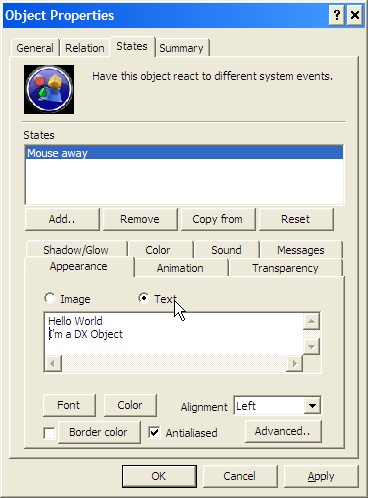
- In this window,
select "TEXT" (see the arrow!) and it will show you a Text Entry
area.
- Type in "Hello
World I'm a DX Object" or whatever you want it to say!
- Click on "APPLY" and
you will have your first DX Object:
|
|
|
|
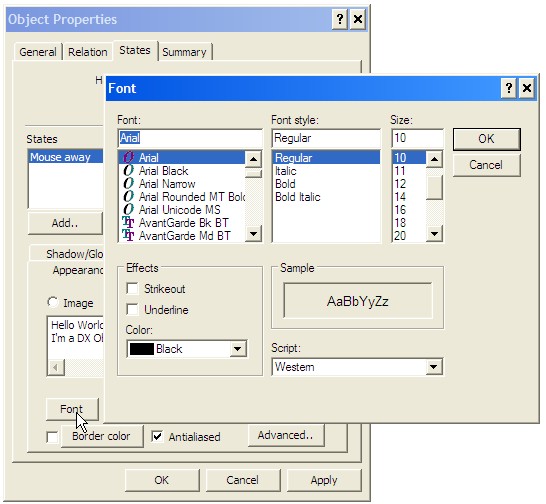
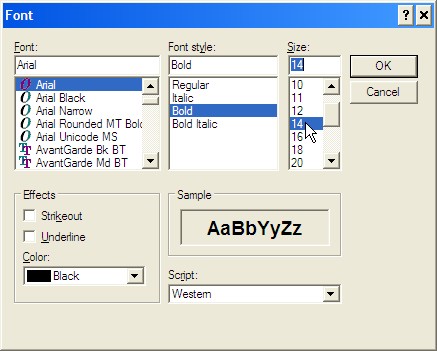
STEP 4 - Changing the FONT/STYLE/SIZE |
- RIGHT-CLICK
on the new Object and select PROPERTIES
- Click on the
STATES Tab
- Click on the FONT
button (see arrow!)
- Use this window to
pick a font, style and size, and then select OK
- You will need to
select APPLY on the PROPERTIES window to have these
changes show on your object.
- If you don't like
look, repeat the process above until it looks the way you want.
|
|
|
|
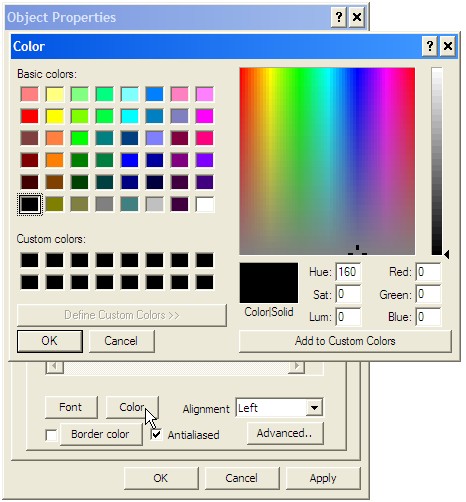
STEP 5 - Changing the FONT COLOR |
- RIGHT-CLICK
on the new Object and select PROPERTIES
- Click on the
STATES Tab
- Click on the
COLOR button (see arrow!)
- Use this window to
pick a color you wish to use for your text then select OK
- You will need to
select APPLY on the PROPERTIES window to have these
changes show on your object.
- If you don't like
look, repeat the process above until it looks the way you want.
|
|
|
|
STEP 6 - Creating a MOUSE-OVER/OUT Effect |
|
Ok, so we have our text, its
boring, its just sitting there doing NOTHING. Don't you want to
have it change color, style, font, or size you move your mouse over it?
Well, in DX this is VERY
simple.
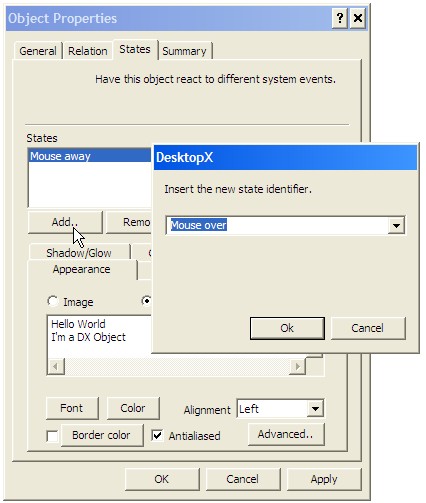
- RIGHT-CLICK
on the new Object and select PROPERTIES
-
Click on the STATES
Tab
- Click on the
ADD button (see arrow!) under the STATES window.
- Select Mouse over
from the drop-down list, click OK.
- This will create a
BLANK STATE for the object.
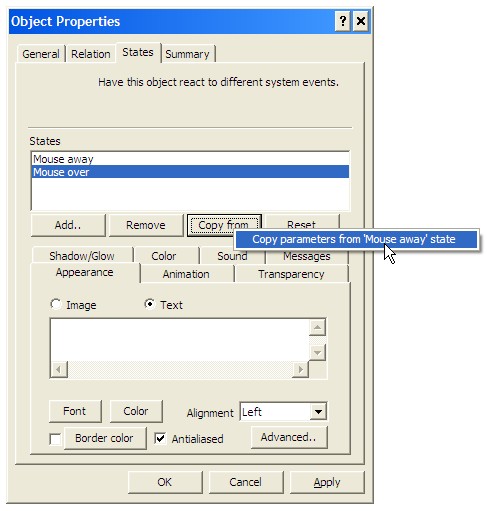
If you look at the original State that was already created (the
default one) it shows Mouse Away DX has code built into it to
handle this simple Rollover task.
- Use the COPY FROM
button under the STATES area and pick Copy Parameters from 'Mouse
Away' State this makes the Mouse OVER state identical to the
Mouse AWAY state.
- The idea here is to
save time. This makes it so that both states are the same to
start with.
- We are going to
change the font to BOLD and its Size to 14 so that when we move
the mouse over it, it will turn BOLD and grow in size.
- You can pick
whatever combination of font, color, size & style you want to
make it look the way you want.
- Click OK
on the window below when you are Done.
- You will need to
select APPLY on the PROPERTIES window to have these
changes show on your object.
- If you don't like
look, repeat the process above until it looks the way you want.
Test it out, move
your mouse over the object and see what it does. |
|
|
|
CONCLUSION |
|
Ok, you have made your first
DX Object, now what?
Check back as I add new
Step-By-Step Tutorials on how to make this a link to a folder, web-site,
or just about anything you want!
I hope you have enjoyed
this step into DX, and look forward to the next installment.
|
